[vc_row][vc_column][vc_video link=”https://www.youtube.com/watch?v=N45FP6ctLes”][/vc_column][/vc_row][vc_row][vc_column][vc_column_text][fbshare type=”button”] Around 6 years ago I purchased a Bioforce 3000 UV pond filter online. The 3000 stands for a filter capable of supporting a pond up to 3000 liters and the UV means it as an ultra violet feature as part of the filter. When I originally purchased it, it was advertised as a filter for a 3000 gallon pond. I only later found out that, being a european brand, it was actually liters and not gallons.
By then I had already discovered that it just did not have the capacity of filtering my pond, even though my pond is around 800 gallons (around 3000 liters).


Not only did the Bioforce 3000 filter struggle keeping my water clean, but I had a bunch of things break. The inlet pipes broke, the inlet housing split and the clogged filter indicator continuously jammed and never worked. The annual upkeep of replacing the foam filters made this a very expensive filter to maintain. This Spring I decided to make my own filter based on pretty much the same method that most biological filters employ using standard of the shelf items. I saw some online users claiming to be able to make filters for $25 but realistically, even though I got a bunch of the items for free by just looking for items on craigslist, I still ended up spending around $60. Depending on the size of your pond and which parts you can get for free and which parts you need to buy, you will probably end up spending somewhere between $50 and $100 to make you own filter.

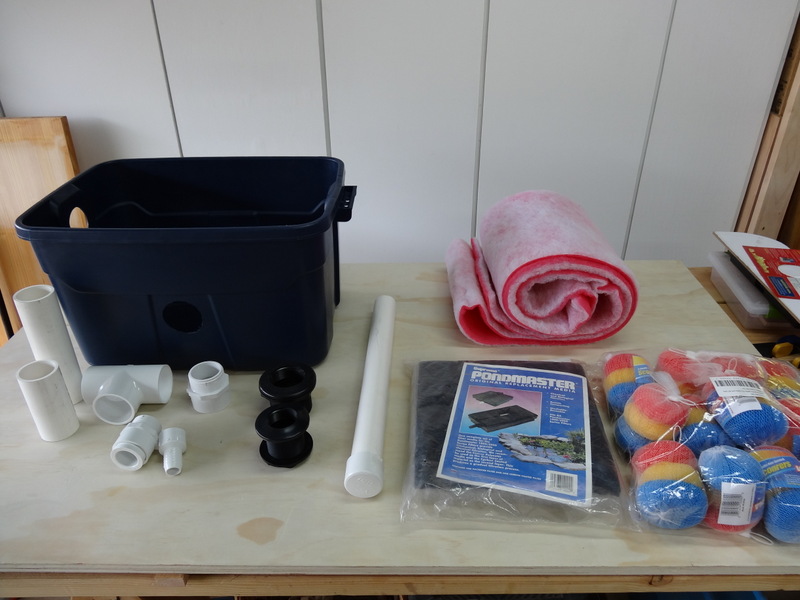
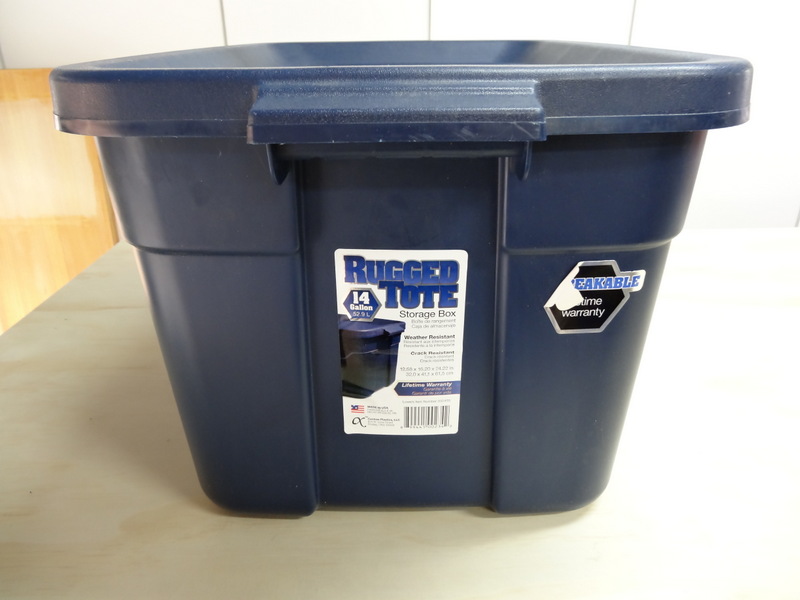
In order to make a biological filter you will need to start with a tote. The size of tote will depend on the size of your pond and the number of fishes. My pond is around 1000 gallons and I am using a 14 gallon rugged tote I purchased at Lowes for around $6. Ideally you want to circulate the entire contents of your pond in an hour or two. My pump is rated at 900 gallons per hour and the 14 gallon tote is adequate for this.
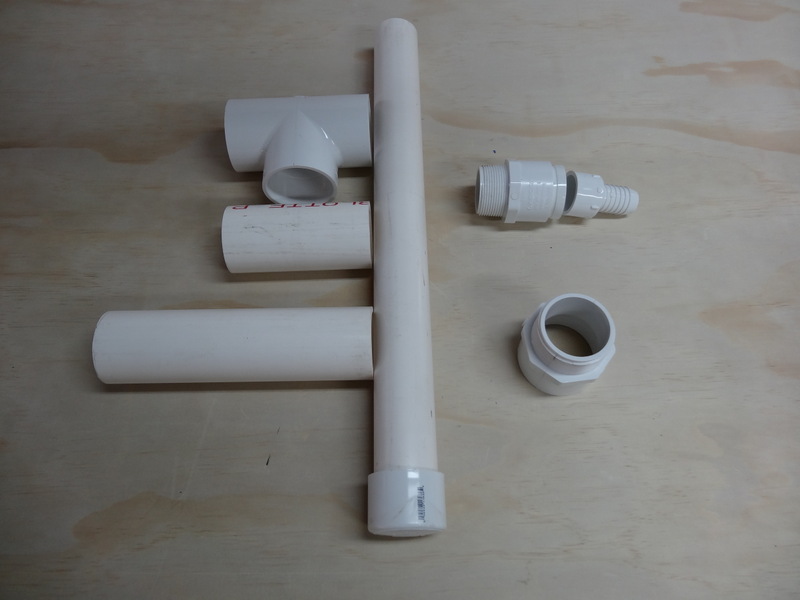
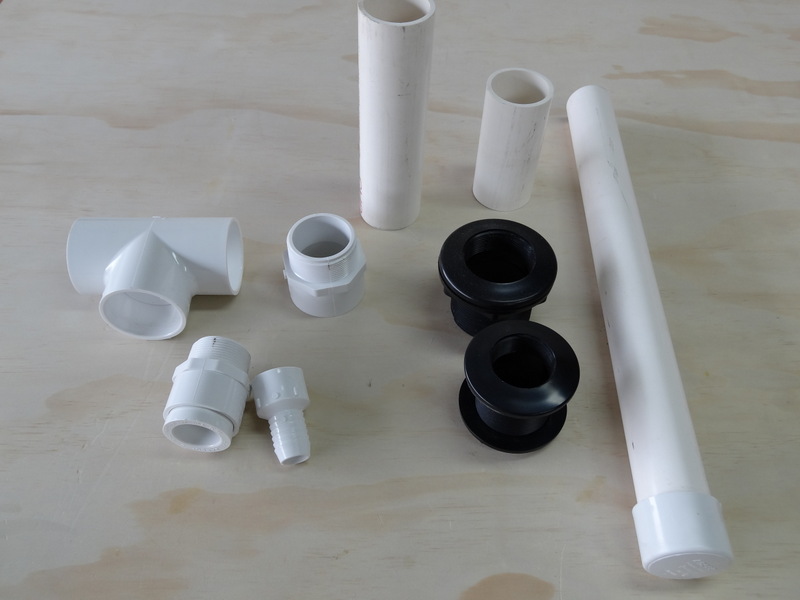
The plumbing inside the tote is really simple. You will need an inlet pipe and an outlet pipe. The outlet pipe should be larger than the inlet. I am using 1.5″ pipe for the inlet and 2″ pipe for the outlet. You need to place the inlet pipe along the top of your tote and the outlet pipe around halfway up one side (or at least a distance above your bacteria colony). The outlet pipe needs to extend both upwards and downwards and to do this I am using a t joint.
The PVC pipes are connected between the inside of your tote and the outside world with bulkhead fittings. These were the most expensive part of my home made filter costing around $18 for both. For both bulkhead fittings I purchased them as slip fitting on the inside and threaded on the outside. I just used friction fit on the inside where it is not critical if the pipes are not absolutely watertight and the threaded fitting on the outsides allow me the flexibility to disconnect everything in case I need to move the filter.
The inlet pipe should be drilled so that the water coming in from the pond is showered over the filter material. The outlet stem will draw water up from the bottom of the tote so you will also need to drill holes at the bottom of the outlet stem to facilitate this. The upper pipe will extend upwards to act as an overflow safety mechanism.
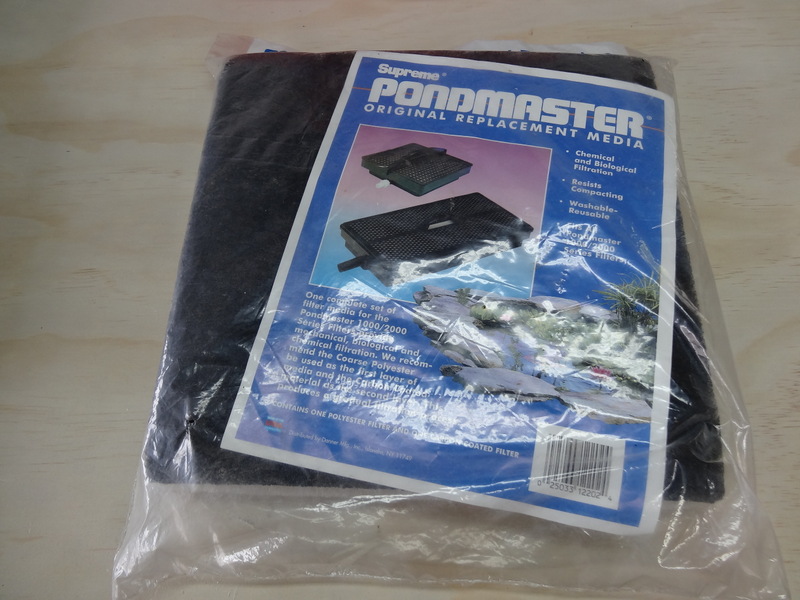
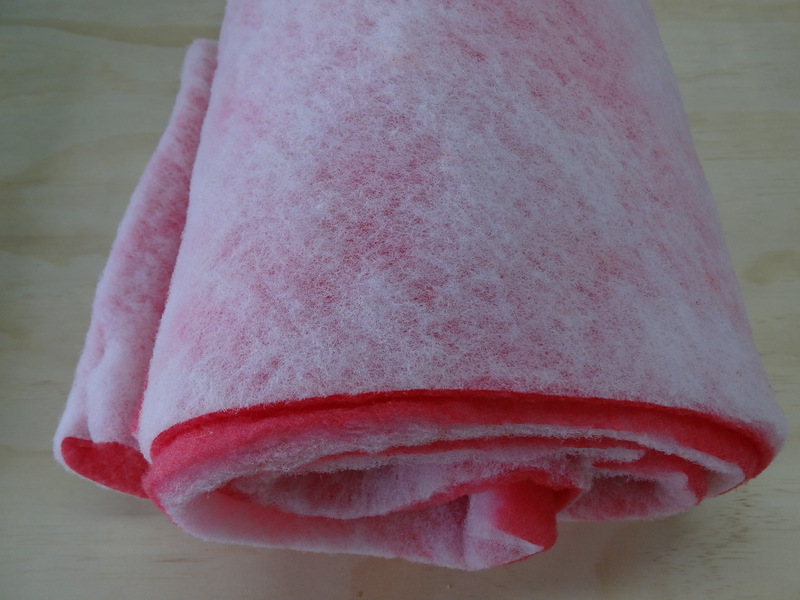
It is normal to use 3 layers of filter material starting with coarse and following that by medium and finer layers of filter material. The coarse material will trap the larger waste products first and finer waste will be trapped by the finer filter layers. To keep the overall cost as low as possible I purchased a roll of filter material off ebay for around $7. The material is a 1 inch thick sandwich of coarse and fine material. I just stacked several layers of the material on top of each other, which is not ideal but seems to work just fine.
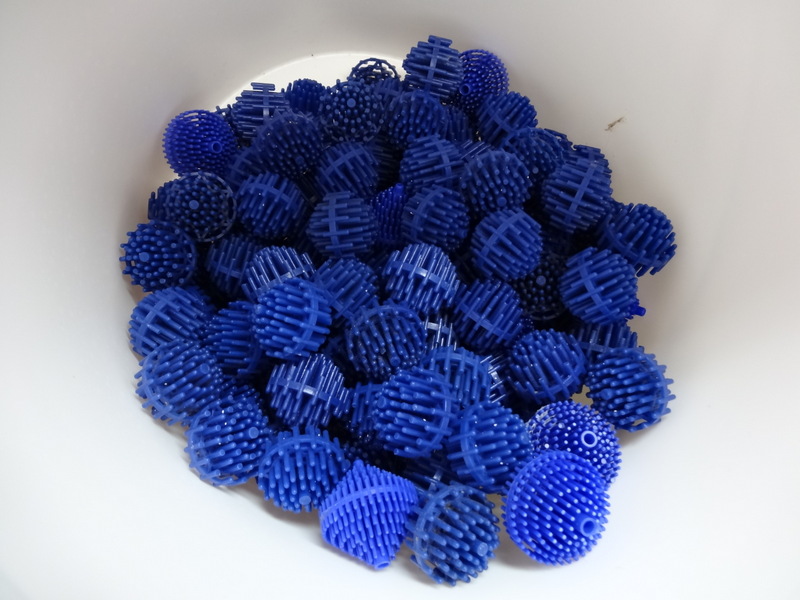
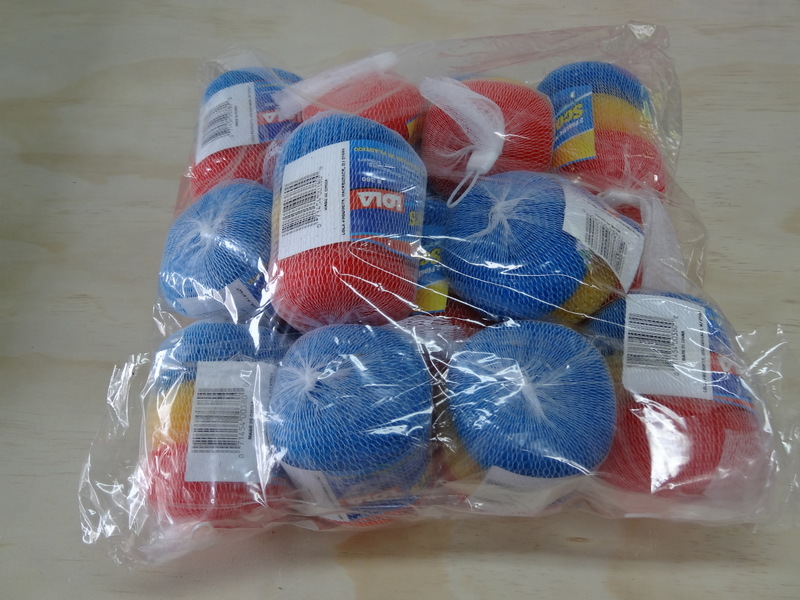
I am using bio balls for growing my bacteria colony and I was fortunate enough to find around 2 gallons of these for free off craigslist. Other filters I saw online suggested using plastic pot scourers as the medium to grow your biological bacteria. I found a set on amazon for cheaper than purchasing these at the dollar store (as other people were suggesting) and I purchased these before I found the bio balls for free so I am stacking these on top of the bio balls but you really only need one or the other.
Finally you will need to make some sort of support system to keep the filter material above the bio balls. I used a plastic mesh container that was used to grow seedlings in and I cut it to fit neatly in the tote to support the filter material over the bio balls and pot scourers.
One thing to highlight is the need for an overflow system. The reason for this need is because the top layers of filter material can become clogged over time slowing down the water flow through the filter material. This can result in an increase in the water level in the tote. The overflow pipe will allow the excess water to escape in order to prevent the water level from rising to the top of the tote and overflowing the filter system.
This is pretty much all you need to know in oder to make a simple biological filter for your pond. If you want to learn more about how pond filters work then google “nitrogen cycle“. For an alternative homemade filter, check out the “skippy filter“.
Parts you will need:

[/vc_column_text][/vc_column][/vc_row]